·Mission Map
Twelve parts, four appendices, one goal: by the end you can read, fix, and write every program on our robot.
- Python from Zero — print, variables, if/else, loops, functions, imports — taught from our real code
- Meet Pybricks and Our Robot — the hub, the ports, your first hub program, working with files, and a line-by-line tour of setup.py
- This Year's Robot — measure, calibrate, and build HHHub1's setup.py from scratch
- Driving the Robot — straight, turn, arc, lines and walls — and the sign rules that predict every move
- Attachment Arms — run_angle, run_until_stalled, run_target, and self-calibrating arms
- Doing Two Things at Once — async, await, multitask — our biggest competitive weapon
- The Master Program — the color-sensing menu that picks the right run
- Timing Your Runs — racing the 2:30 clock with StopWatch
- Bug Hunt! — seven real bugs we shipped last season — find them before we tell you
- Making It Better — this year's upgrades: DRY, profiles, helpers, and the dictionary menu
- Accurate Every Time — the consistency checklist that wins tournaments
- Your Turn — The Practice Ladder — ten levels from Hello Robot to the consistency boss fight
- A. Cheat Sheet — every command on one page — tape it to the practice table
- B. Glossary & Documentation Links — the vocabulary, plus where the official truth lives
- C. Answer Key — worked answers for the early ladder levels (no peeking until you tried!)
- D. The Video Lab — turn practice phones into measuring instruments with ffmpeg
1Python from Zero
Here's our deal with you: we teach Python using the actual programs our team ran at last year's tournament. Not toy examples. The real thing, including the bugs we shipped. By the end of this part you can read most of last season's code.
Python is a language for giving computers (and robots) instructions. A program is just a list of instructions the computer follows top to bottom, one line at a time. That's it. Everything else in this book is detail.
1.1 Your first instruction: print()
print("Robot initialized successfully!")print() makes the robot send a message to your laptop screen. Whatever is inside the quotes gets shown exactly as written. And here's a fun fact: that line above is the last line of our real setup.py. Our robot literally says hello every time it wakes up.
Three things to notice:
printis a function — a named action the computer already knows how to do.- The parentheses
()hold the input you give the function. "Robot initialized successfully!"is a string — text wrapped in quotes.
1.2 Comments: notes for humans
Any line starting with # is invisible to the robot. It's a note for teammates.
# left and right drive motors    <-- robot skips this line
ldrive = Motor(port=Port.A)      # <-- robot runs this part, skips this note
Our code is full of comments like # Hit the forge and # Speed up and go back home. Good comments explain why, so a teammate can follow the plan. So can you, three weeks from now, at 9pm the night before a tournament, wondering what past-you was thinking.
1.3 Variables: giving things a name
A variable is a name that stores a value — think of it as a labeled box you can put something in and open later. You create one with = (read it as "gets", not "equals"):
timer = StopWatch()        # timer now means "the stopwatch"
attachment_color = sensor.color()   # store whatever color the sensor sees
current_voltage = hub.battery.voltage()
After that, anywhere you write timer, Python knows you mean that stopwatch.
1.4 Numbers (and True/False)
Python understands numbers without quotes, and it does math for you:
robot.straight(120)     # 120 is a number: drive 120 millimeters
robot.straight(-165)    # negative number: drive BACKWARD 165 mm
await robot.straight(-67*3)   # Python computes -201 so you don't have to
* means multiply, / divide, + add, - subtract. That last line is real code from Run 6. Somebody needed three backwards nudges of 67 mm and let Python do the arithmetic. Good instinct — copy it.
(Spot that await out front? Ignore it for now. It's how we tell the robot "finish this before moving on," and Part 6 explains it properly. Nearly every robot command in this book wears one — just copy it along for the ride. One thing to know early: await only works inside the async def run(): functions our run files use. If you're typing a quick two-line test directly into the editor, leave await off — the command still waits on its own. Same deal with names like robot, timer, and larm: they get built in Part 2. For now, just follow what each line does.)
One more kind of value you'll meet: True / False (called a boolean) — the answer to a yes/no question. robot.use_gyro(True) and while True: both use one.
1.5 f-strings: mixing text and values
Put an f before the quotes and wrap variables in {curly braces} to build messages with live values inside:
print(f"RUN 3: ", timer.time())            # works, but clunky
print(f"Run 2 Complete! Time: {timer.time()/1000} seconds")   # nicer!
The second line, straight from Run 2, grabs the stopwatch time, divides by 1000 to convert milliseconds to seconds, and drops the result right into the sentence.
1.6 Functions: making your own named actions
You already used functions other people wrote, like print. You can define your own with def:
def main():
    timer = StopWatch()
    print("Menu is starting")
def main():means "I'm defining a function named main."- Everything indented underneath belongs to the function.
- Defining a function doesn't run it! You run it later by writing
main().
1.7 Arguments: giving functions information
Functions can take inputs, called arguments:
robot.straight(410)                          # one argument: distance
robot.arc(radius=-40, distance=33)           # named (keyword) arguments
larm.run_angle(speed=-200, rotation_angle=200, then=Stop.HOLD)
Named arguments like radius=-40 earn their keystrokes because you can read what each number means. robot.arc(-40, 33) would work, but quick — which number is which? Our team's style is to name arguments on anything with more than one number. Keep doing that.
1.8 Making decisions: if / elif / else
if attachment_color == Color.WHITE:
    print("White Attachment")
    menu = (1,2,3,4,5,6,7,8,9)
elif attachment_color == Color.YELLOW:
    print("Yellow Attachment")
    menu = (3,4,5,6,7,8,9,1,2)
else:
    print("Unable to detect colored attachment")
    menu = (1,2,3,4,5,6,7,8,9)
This is straight from our master program. Read it out loud: "If the attachment color equals white, do this. Or else if it's yellow, do that. Otherwise, do the fallback." Python checks each condition from the top and runs the first block that matches.
1.9 Repeating things: loops
A for loop repeats a known number of times. This is from Run 3, the Silo mission, where the arm has to pump three times:
for i in range(3):
    await rarm.run_angle(speed=1000, rotation_angle=205, then=Stop.HOLD)
    await rarm.run_angle(speed=-1000, rotation_angle=205, then=Stop.HOLD)
range(3) produces 0, 1, 2 — so the indented lines run three times. Arm down, arm up, three times. Without the loop we'd copy-paste those two lines three times, and then when you re-tune the angle at practice, you'd have to fix it in three places and you'd forget one. (Foreshadowing: Part 9 is full of bugs born exactly this way.)
A while loop repeats as long as something is true. From our main menu:
while True:
    selected = hub_menu(*menu)
    ...
while True: means "repeat forever" — until something inside stops it, like break, which jumps out of the loop immediately.
1.10 Imports: borrowing code from other files
Nobody writes everything from scratch. import pulls in code someone else already wrote — including past-you:
from pybricks.hubs import PrimeHub     # get PrimeHub from the pybricks library
from setup import hub, robot, larm, rarm, timer   # get OUR robot from OUR setup.py
import setup # run the whole setup file1.11 Tuples: a bundle of values
menu = (3,4,5,6,7,8,9,1,2)Parentheses with commas make a tuple — an ordered bundle of values. We use one to hold the menu order. The * in hub_menu(*menu) "unpacks" the bundle, handing each number to hub_menu as a separate argument. You'll meet *-unpacking again in Part 10, where it gets even more useful.
2Meet Pybricks and Our Robot
Time to meet the machine. In this part you'll learn what Pybricks is, write your very first hub program, and then we'll walk through our real setup.py line by line — because every single run imports it. Understand this one file and you understand the foundation of everything.
Pybricks is the software we install on the SPIKE Prime hub so we can program it in Python. (Technically it's MicroPython, a small Python that fits on the hub — for everything in this book, it's just Python.) You write code at code.pybricks.com, it travels to the hub over Bluetooth, and print() messages come back to your screen while the robot moves.
2.1 The hub and the ports
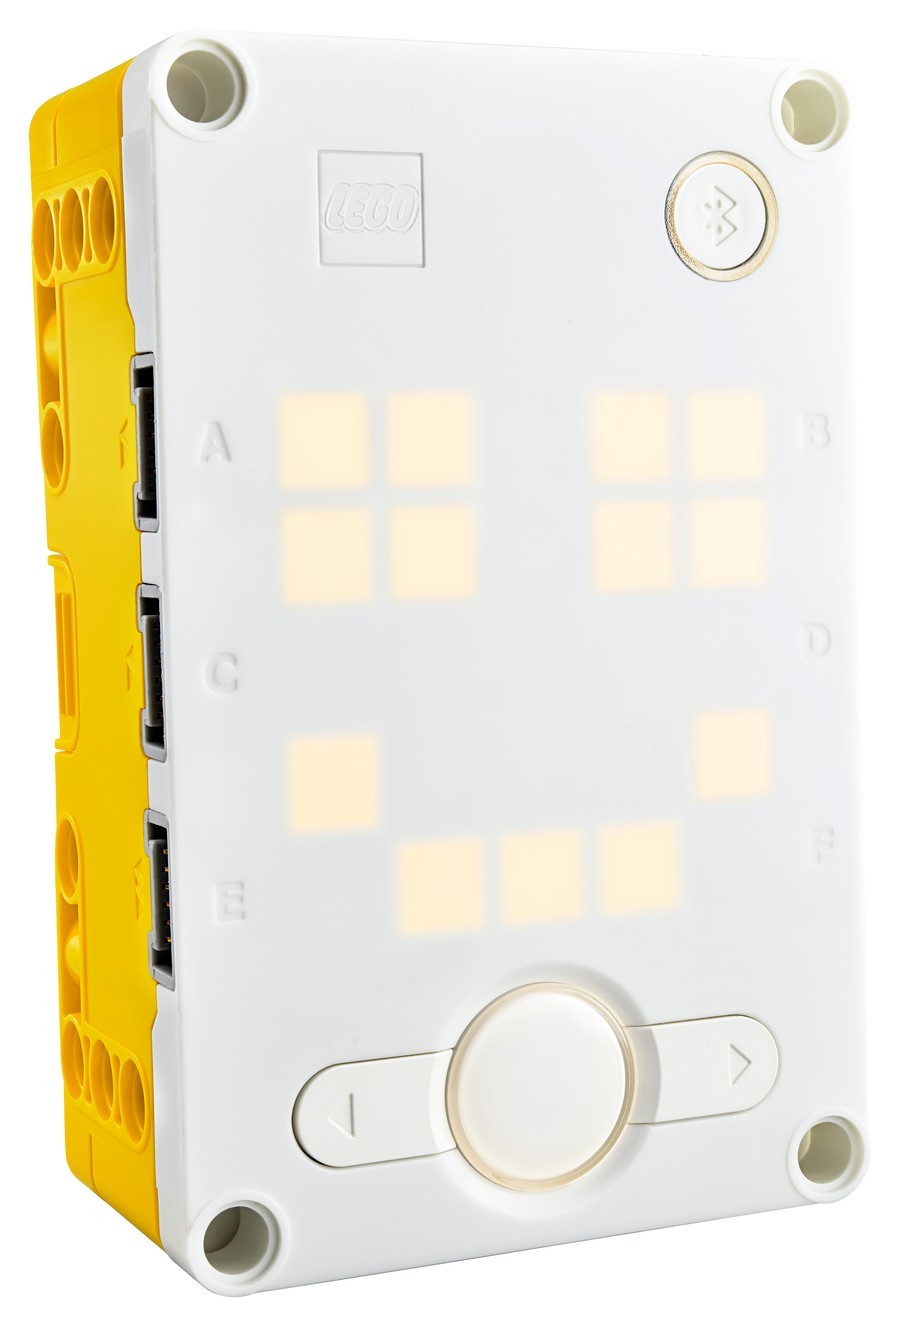
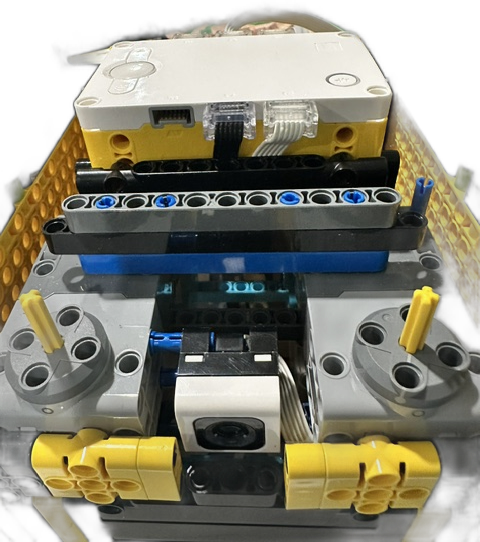
The hub is the robot's brain: a small computer with a 5×5 light display, buttons, a gyro sensor inside, and lettered ports around the edges. Everything plugs into those ports, and the letters matter — code says "the motor on Port A," so if someone rebuilds the robot and swaps two cables, the robot turns left when it should go right. On our robot:
| Port | What's plugged in | Name in code |
|---|---|---|
| A | Left drive wheel motor | ldrive |
| B | Right drive wheel motor | rdrive |
| C | Left attachment arm motor | larm |
| D | Right attachment arm motor | rarm |
| (sensor port) | Color sensor (reads attachment color) | sensor |
2.2 Hello, hub: your first program
Before the big setup file, make the hub glow, smile, and beep — three lines of pure joy:
from pybricks.hubs import PrimeHub
from pybricks.parameters import Color, Icon

hub = PrimeHub()

hub.light.on(Color.GREEN)     # glow green
hub.display.icon(Icon.HAPPY)  # show a smiley
hub.speaker.beep()            # beep!
See the dots? hub.light.on() reads like ownership: the hub's light, turned on. Each dot zooms into a smaller part — like "my backpack's front pocket's zipper."
2.3 setup.py — building the robot, line by line
This is last year's real setup file with a tour-guide commentary. Every run imports this file, so understand it once and you understand the foundation of everything.
from pybricks.hubs import PrimeHub
from pybricks.pupdevices import Motor
from pybricks.parameters import Direction, Port, Stop
from pybricks.robotics import DriveBase
from pybricks.tools import StopWatch
Borrow the building blocks from the Pybricks library: the hub type, the motor type, some named constants (Port.A, Stop.HOLD...), the DriveBase (two motors working as one vehicle), and a stopwatch.
hub = PrimeHub()
timer = StopWatch()
Create the hub object and a stopwatch, and give them names.
ldrive = Motor(port=Port.A, positive_direction=Direction.COUNTERCLOCKWISE)
rdrive = Motor(port=Port.B, positive_direction=Direction.CLOCKWISE)
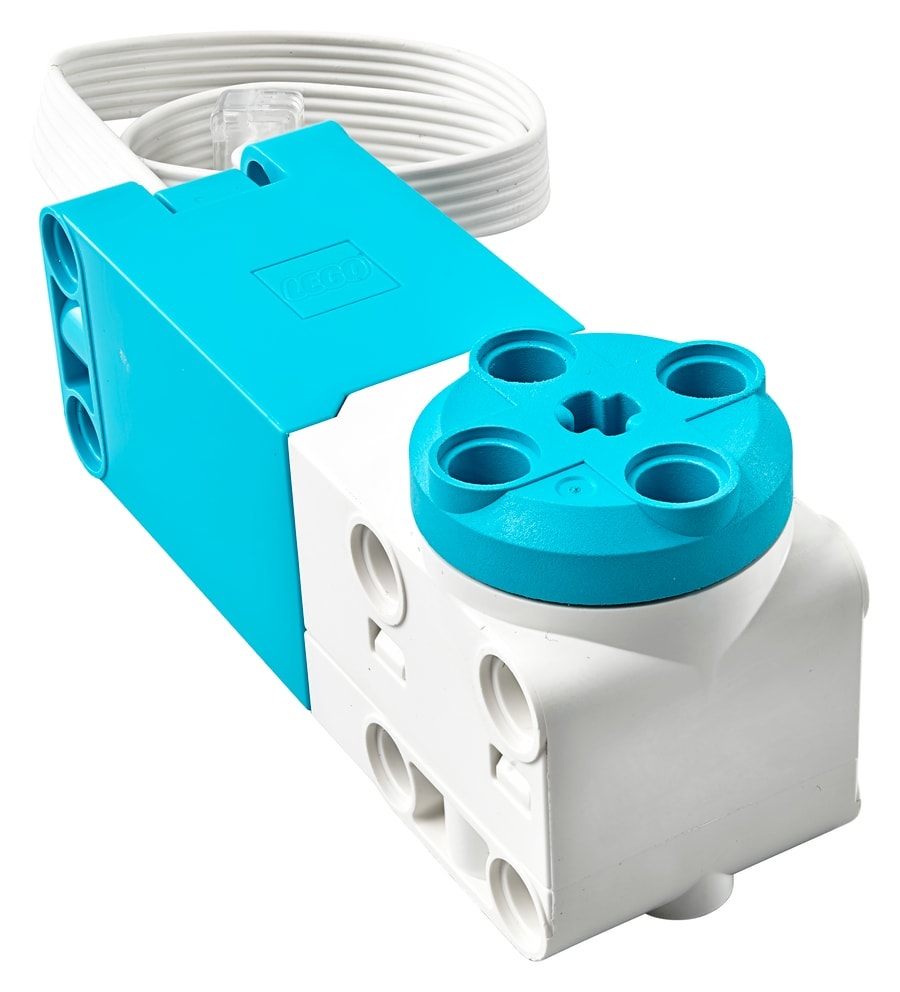
Create the two drive motors. Why is one counterclockwise? The motors are mounted mirror-image on either side of the robot. Telling Python which spin direction counts as "positive" means "positive = robot goes forward" for both wheels.
robot = DriveBase(left_motor=ldrive, right_motor=rdrive,
                  wheel_diameter=56, axle_track=120)
The DriveBase is the smartest object in Pybricks. Give it both motors plus two measurements — wheel diameter (56 mm) and the distance between the wheels (120 mm) — and it can do the math to "drive exactly 300 mm" or "turn exactly 90 degrees." If those two numbers are wrong, every distance and every turn will be wrong. Part 3 shows you how to measure them properly on the new robot.
robot.use_gyro(True)
robot.reset()
robot.settings(900, 600, 600, 400)use_gyro(True)— use the hub's built-in gyroscope for straighter driving and more accurate turns (instead of only trusting wheel rotation, which slips on the mat).reset()— set the distance/angle counters to zero.settings(...)— four numbers, in this exact order: straight speed (mm/s), straight acceleration, turn rate (deg/s), turn acceleration. You'll seerobot.settings(...)sprinkled all through the runs to go fast on open mat and slow down for precision moves.
larm = Motor(port=Port.C, gears=[12, 20, 12, 20])
rarm = Motor(port=Port.D, gears=[12, 20, 12, 20])

larm.control.limits(speed=1000, acceleration=1000, torque=1000)
rarm.control.limits(speed=1000, acceleration=1000, torque=1000)
The two attachment arm motors. gears=[12, 20, 12, 20] tells Pybricks the gear train between motor and arm (a 12-tooth driving a 20-tooth, twice), so when we say "rotate the arm 100 degrees" Pybricks converts that to the right amount of motor rotation automatically. control.limits caps how fast/hard the arm motor is allowed to work.
current_voltage = hub.battery.voltage()
print("Robot initialized successfully!")
Read the battery voltage and announce we're alive. (Spoiler for Part 10: we read the voltage into a variable... and then never use it. Battery level strongly affects robot consistency — we should print it!)
2.4 Working with files in the Pybricks editor
Our code lives in many files — setup.py, run1.py through run9.py, main.py — and they import each other. Here's how that works at code.pybricks.com:
- Create a file: click the + (new file) button in the file list on the left and type the name, like
setup.py. The.pyending matters. - Run a file: open it so it's the active tab, then press the Run button (or F5). Pybricks sends that file to the hub — plus any files it imports.
- Import between files:
from setup import robotworks as long assetup.pysits in the same file list. No folders, no paths — just the name without.py. - Name files exactly.
import run1looks forrun1.py— capitalization and spelling must match, or you getImportError: no module named 'run1'. (Ask us how we know.)
3This Year's Robot — Build HHHub1's setup.py
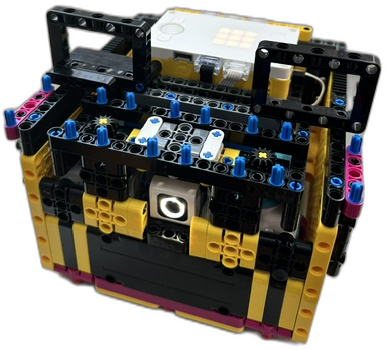
Last year's code drives last year's robot. This year's robot — hub name HHHub1 — needs its own setup.py, and this part is where you build it. The skeleton is the same; the measurements and strategy are new.
3.1 This year's port map
| Port | What's plugged in | Use it like |
|---|---|---|
| A | Left drive wheel | Motor(Port.A, ...) |
| B | Right drive wheel | Motor(Port.B, ...) |
| C | Left liftarm / attachment | Motor(Port.C) |
| D | Right liftarm / attachment | Motor(Port.D) |
| E | Color sensor (attachment ID) | ColorSensor(Port.E) |
| F | (empty) | — |
3.2 Measure wheel_diameter (the easy one)
It's the height of your wheel in millimeters. LEGO prints it right on the tire! Look on the rubber for tiny writing like 56 x 14 — the first number is the diameter: 56 mm. No writing? Measure across the middle of the wheel with a ruler.
3.3 Measure axle_track (the sneaky one)
It's the distance between the middles of the two wheels — not the insides, not the outsides, the centers. Measure from the center of the left tire straight across to the center of the right tire. A LEGO trick: count studs between wheel centers and multiply by 8, because one stud = 8 mm.
3.4 Now test it — the drive-and-measure check
Numbers from a ruler get you close. Real robots have squishy tires and tiny wobbles, so we let the robot itself tell us the truth:
# Calibration test 1: does 500 mm really mean 500 mm?
from setup import robot
robot.straight(500)
# Now measure with a tape measure how far it ACTUALLY went.- Drove too far (say 510 mm)? Your real wheels are bigger than you told it. Nudge
wheel_diameterup a tiny bit. - Drove too short? Nudge
wheel_diameterdown.
# Calibration test 2: does a 360 spin end facing the same way?
robot.turn(360)
# Put a piece of tape on the front so you can see exactly where it points.- Turned too little? Make
axle_trackbigger. - Turned too much? Make
axle_tracksmaller.
3.5 Named speed profiles
Last year, mystery tuples like robot.settings(970, 8000, 900, 2000) appear dozens of times. Which one is "precision mode"? Nobody remembers. This year we name them (you'll see them again in Part 10):
# Speed profiles: (straight_speed, straight_accel, turn_rate, turn_accel)
PRECISE = (300, 300, 200, 200)    # slow + gentle: aligning on mission models
NORMAL  = (700, 600, 500, 400)    # everyday driving
FAST = (970, 6000, 800, 4000) # open mat / rushing home3.6 Put it together: this year's setup.py
Here's the starting point — same shape as last year's, with this year's facts and the profiles built in. The ??? marks are yours to measure:
# setup.py - HHHub1 (BIOGLOW 2026-27)
from pybricks.hubs import PrimeHub
from pybricks.pupdevices import Motor, ColorSensor
from pybricks.parameters import Direction, Port, Stop
from pybricks.robotics import DriveBase
from pybricks.tools import StopWatch

hub = PrimeHub()
timer = StopWatch()

ldrive = Motor(port=Port.A, positive_direction=Direction.COUNTERCLOCKWISE)
rdrive = Motor(port=Port.B, positive_direction=Direction.CLOCKWISE)

# MEASURE these (3.2-3.4), then calibrate. Wrong numbers = every move wrong.
robot = DriveBase(left_motor=ldrive, right_motor=rdrive,
                  wheel_diameter=56, axle_track=112)   # <-- ??? verify!

robot.use_gyro(True)
robot.reset()

# Speed profiles (3.5)
PRECISE = (300, 300, 200, 200)
NORMAL  = (700, 600, 500, 400)
FAST    = (970, 6000, 800, 4000)
robot.settings(*NORMAL)

larm = Motor(port=Port.C)    # add gears=[...] once the liftarm gearing is final
rarm = Motor(port=Port.D)

sensor = ColorSensor(Port.E)

voltage = hub.battery.voltage()   # millivolts
print(f"HHHub1 initialized. Battery: {voltage} mV")
if voltage < 7600:
    print("*** LOW BATTERY - runs may be inconsistent! Charge or swap. ***")
Notice it already includes two Part 10 upgrades (named profiles, the battery warning) — this year we start clean.
4Driving the Robot
All distances are millimeters, all angles are degrees. The sign conventions (from the official docs) are:
- Positive distance = forward. Negative = backward.
- Positive angle = turn right (clockwise from above). Negative = left.
4.1 The three core moves
await robot.straight(410)     # forward 410 mm
await robot.straight(-135)    # backward 135 mm
await robot.turn(90)          # spin in place 90° right
await robot.turn(-84)         # spin in place 84° left
await robot.arc(radius=-40, distance=33)   # curved drive
(That await word — "do this and wait until it finishes" — gets fully explained in Part 6. For now just include it.)
4.2 Arcs: driving in curves
robot.arc(...) drives along part of a circle. You pick:
radius— the size of the circle. Positive radius = circle is to the robot's right (curving right); negative = circle to the left (curving left). Small radius = tight curve, big radius = gentle curve.- Then how far along the circle: either
distance=...(mm along the curved path; negative drives the arc in reverse) orangle=...(how many degrees of the circle to sweep).
Real examples from our runs:
robot.arc(radius=-900, distance=670)    # Run 1: gentle left sweep out of base, 670 mm
await robot.arc(radius=-20, distance=16)  # Run 1: tiny nudge to "Hit who lived here"
await robot.arc(radius=-2000, distance=-425)  # Run 2: nearly-straight arc BACKWARD to base
await robot.arc(radius=65, angle=86)    # Run 7: tight right arc sweeping 86°
Why arcs instead of turn-then-straight? One smooth arc is faster and often more repeatable than stopping to turn. Watch our Run 9: it's basically two arcs and a turn — that's the whole run.
4.3 Changing speed mid-run with settings()
robot.settings(970, 400, 600, 400)     # careful launch
...
robot.settings(970, 8000, 900, 2000)   # cranked acceleration to rush home
Slow and gentle near mission models (precision), fast and violent on the way home (the clock is running!). You'll see this pattern in every run. (This year: robot.settings(*PRECISE) and robot.settings(*FAST) — same idea, readable names.)
4.4 Flowing moves with then=Stop.NONE
By default the robot fully stops after each command (jerky!). then=Stop.NONE keeps the speed rolling into the next move — use it on every move except the last:
from pybricks.parameters import Stop

await robot.straight(400, then=Stop.NONE)  # keep rolling...
await robot.arc(radius=150, angle=90)      # ...glide into the curve, then stop
Chained with arcs, this is how a run stops looking like a robot doing homework and starts looking like a racing line.
4.5 The gyro trick at the end of runs
Almost every run ends with:
robot.use_gyro(False)Why? With the gyro on, the DriveBase actively fights to hold its heading even after the run ends — if a kid picks the robot up, the wheels spin trying to "correct." Turning the gyro off makes the robot relax so it can be carried back to base safely. Then the next run's start (or setup) turns it back on. Neat trick — keep it.
4.6 Stop behaviors: HOLD, BRAKE, COAST
Many commands take then=Stop.SOMETHING — what should the motor do after finishing?
Stop.HOLD— actively hold position (fights back if pushed). Best when the arm must stay put under load.Stop.BRAKE— passively resist.Stop.COAST— go limp. Used in Run 5's grabber so the claw can settle around the artifact without fighting it.Stop.NONE— don't even slow down; flow into the next command (4.4).
4.7 Lines and walls: fixing position mid-run
Wheels slip a tiny bit on every move, and tiny errors add up over a long run. The cure is to re-check position against something real on the field — a black line on the mat, or the border wall. Champions do this constantly.
Driving to a line. Point a color sensor at the mat and read sensor.reflection() — a brightness number from 0 (black) to 100 (white). Drive slowly until the number drops, and you know exactly where you are:
robot.drive(150, 0)                    # roll forward slowly, no turning
while sensor.reflection() > 25:        # white mat reads high, black line reads low
    wait(10)                           # check about 100 times per second
robot.stop()                           # front of the sensor is ON the line — a known spot!
robot.drive(speed, turn_rate) starts the robot moving and keeps it moving until you say stop — that's what lets the while loop watch the sensor mid-drive. Measure your own numbers first: print(sensor.reflection()) over mat and over line, then pick a threshold in between.
Squaring on a wall. Even simpler — no sensor at all. Back up into the border wall a little farther than the distance to it; the wall stops both wheels, and now the robot is perfectly straight with a known position. It feels like cheating. It's not — it's engineering:
robot.settings(*PRECISE)     # gently!
robot.straight(-150)         # the wall stops you square
robot.reset() # zero the counters at this trusted spotHardware note for HHHub1: our color sensor on Port E currently faces the attachment (for the Part 7 menu), and Port F is free. If a mission run needs line stops, add a second, mat-facing color sensor on F — line_sensor = ColorSensor(Port.F) in setup.py — or build the season's attachments so the E sensor can see the mat.
5Attachment Arms
Drive motors move the robot; larm/rarm move whatever attachment is bolted on.
5.1 run_angle — move an exact amount
await rarm.run_angle(speed=-970, rotation_angle=110, then=Stop.HOLD)"Turn the right arm motor at speed 970 in the negative direction, through 110 degrees, then hold." Every run file has a comment block at the top reminding us which direction is which, like:
"""
- larm "+" down, "-" up
- rarm "+" down, "-" up
"""
(Triple quotes make a multi-line string — used here as a big comment. Also note Run 6's docstring says rarm is REVERSED compared to the others: rarm "-" down, "+" up. Attachment gearing can flip directions — always test with small angles first!)
5.2 run_until_stalled — push until it can't
larm.run_until_stalled(-970, then=Stop.HOLD, duty_limit=28)Run the arm until it physically stalls (hits its mechanical limit), then hold. duty_limit=28 caps the motor at 28% power so it presses gently instead of grinding gears or lifting the robot.
Why this is brilliant for FLL: it's self-calibrating. No matter where the arm started, run_until_stalled drives it to a known physical position (all the way up / all the way down). Our runs use it constantly to "zero" the arms at the start:
# Run 5: leave base while zeroing BOTH arms simultaneously
await multitask(
    robot.arc(radius=740, angle=65),
    rarm.run_until_stalled(speed=-970, duty_limit=20, then=Stop.HOLD),
    larm.run_until_stalled(speed=970, duty_limit=15, then=Stop.COAST)
)
larm.reset_angle(0)   # define this stalled position as "angle zero"
reset_angle(0) after stalling gives you a trustworthy reference point for every arm move that follows.
5.3 run_target — this year's accuracy upgrade
Last year's runs move arms with run_angle ("turn 110 more degrees from wherever you are"). That works — but small errors pile up, because each move starts from wherever the last one actually ended. Once you've zeroed an arm (5.2), there's a better tool:
larm.run_until_stalled(-200, then=Stop.HOLD, duty_limit=30)
larm.reset_angle(0)              # this spot is now "zero"

await larm.run_target(speed=500, target_angle=120)   # go TO position 120
await larm.run_target(speed=500, target_angle=0) # return exactly home6Doing Two Things at Once (async, await, multitask)
This is the most advanced idea in our codebase — and our biggest competitive weapon. FLL runs are 2.5 minutes total. A robot that raises its arm while driving beats a robot that drives, stops, then raises its arm.
6.1 The problem
Normally Python does one thing at a time. robot.straight(500) would block everything until the drive finishes.
6.2 The Pybricks solution: three new words
Pybricks supports cooperative multitasking (see the official docs page "tools — multitask"). Three new words, each with a friendly translation:
async def run():— "this function knows how to share time." Defining a function withasyncmakes it a coroutine: a function that can be paused and resumed, so other tasks can run during its waits.await something— "finish this step before the next line" — but while waiting, other tasks are allowed to run.multitask(a, b, c)— "run these together" — several awaitable things at the same time, finishing when all are done.run_task(run())— the launcher: runs a coroutine from start to finish. This is how a normal (non-async) program kicks off the async world.
6.3 Reading a real multitask
From Run 1's launch:
await multitask(
    larm.run_until_stalled(-970, then=Stop.HOLD, duty_limit=28),
    rarm.run_until_stalled(670, then=Stop.HOLD, duty_limit=20),
    robot.arc(radius=-900, distance=670)
)
Translation: while arcing out of the base, simultaneously zero the left arm upward and the right arm downward. Three actions, one time slot. The program continues to the next line only when all three finish.
6.4 The one rule of multitask
You can't ask the same motor to do two things at once (just like you can't walk forward and backward at the same time). Multitask different devices: drive base + left arm + right arm = fine. Two commands to larm in one multitask = broken.
6.5 The full skeleton of every run file
from pybricks.parameters import Stop
from pybricks.tools import multitask, wait, run_task
from setup import hub, robot, larm, rarm, timer

async def run():
    print("***** Starting Run X *****")
    hub.display.number(X)         # show run number on hub display
    robot.settings(970, 400, 600, 400)

    # ... mission moves ...

    robot.use_gyro(False)         # relax so we can pick the robot up

if __name__ == '__main__':
    run_task(run())
That last if is a classic Python idiom: __name__ equals '__main__' only when this file is run directly (not when imported by the menu program). So during practice you can run run5.py by itself and it launches itself with run_task(run()) — but on competition day, the master menu imports it and stays in control. Two behaviors, one file. Very slick.
7The Master Program (Color Menu)
On competition day we don't want to fumble through the hub's program list. Our master program:
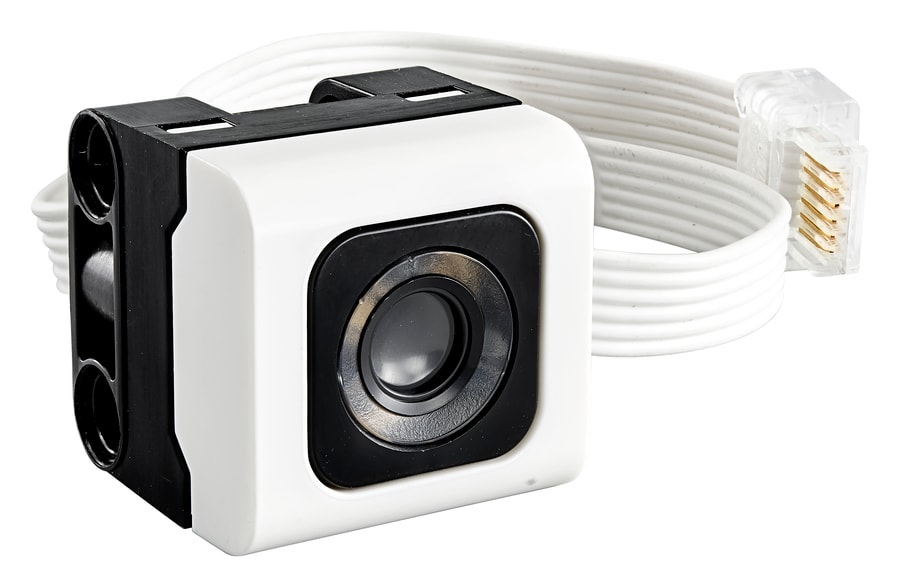
- Reads the color of the attachment currently mounted with the color sensor.
- Reorders the menu so the run that uses that attachment is first.
- Shows a number menu on the hub display — kid presses buttons to pick, presses center to launch.
7.1 Reading the color
sensor.detectable_colors([Color.WHITE, Color.NONE, Color.BLUE,
                          Color.GREEN, Color.RED, Color.MAGENTA,
                          Color.YELLOW])
attachment_color = sensor.color()
detectable_colors narrows the sensor's guesses to only the colors we actually use — hugely improves reliability.
7.2 The menu
selected = hub_menu(*menu)hub_menu (from pybricks.tools) displays each item on the hub's light matrix; left/right buttons cycle, center button selects. It returns the chosen item into selected.
7.3 Launching a run with import
if selected == 1:
    import run1
    run_task(run1.run())
    print(f"RUN 1: ", timer.time())
    break
import run1 loads the file run1.py; run1.run() creates its coroutine; run_task executes it. Then break exits the while True loop... which is actually a problem we'll fix in Part 10!
8Timing Your Runs
Every run tracks time because FLL is a race against a 2:30 clock.
timer = StopWatch()      # created once in setup.py
timer.reset()            # zero it at the start of a run
print(f"Heavy lift completed in {timer.time()}")            # milliseconds!
print(f"Run 2 Complete! Time: {timer.time()/1000} seconds") # seconds — nicer
timer.time() returns milliseconds. Notice our old code is inconsistent — some prints show raw milliseconds, some divide by 1000. Part 10 fixes that.
During practice, these printouts tell you exactly where a run is slow: if "Forge — completed in 41000" but the whole run budget is 30 seconds, you know which segment to attack.
9Bug Hunt! Real Bugs in Last Year's Code
Time to level up from reading code to reviewing it. All of these are genuinely in the binder. Try to spot each one yourself before reading the answer.
Bug 1: The run that lies about its name
Open Run 9 (Site Marking — Last Flag). Look at what it prints and displays:
# Run 7: deliver the last flag (M15)
print("***** Starting Run 7 *****")
hub.display.number(8)
...
print(f"Run 7 Complete! in {timer.time()} seconds")
This is Run 9, but it says Run 7 in the comment and prints, and shows 8 on the display. Run 7's file has the same disease (its comment says # Run 5). Why? Copy-paste. Someone duplicated an old file and forgot to update all the places the run number appears. On competition day, a kid glancing at the hub display could launch the wrong run.
Lesson: when a fact appears in 4 places, someone will forget to update 3 of them. Fix: store it once — RUN_NUMBER = 9 at the top — and use the variable everywhere. (Full fix in Part 10.)
Bug 2: The phantom function
End of Run 4:
if __name__ == '__main__':
    run_task(gray())
    run_task(run())
There's no gray() defined anywhere in the file — it was probably split into run() during cleanup. Run this file directly and it crashes with NameError: name 'gray' is not defined before the robot moves an inch. It only escaped notice because on competition day the menu imports the file, and the if __name__ block never executes.
Lesson: test files the same way they'll actually be used — but also test them standalone, because that's how you'll debug at practice.
Bug 3: The menu that quits after one run
The master program's while True: loop has a break after every run. So: pick a run, it executes, break exits the loop, main() ends, program over. To do the next mission you must restart the whole master program (and Pybricks import caching means a simple "remove the break" isn't quite enough — see Part 10.4 for the right redesign).
Bug 4: Timer says "seconds," shows milliseconds
Run 9 prints f"Run 7 Complete! in {timer.time()} seconds" — but timer.time() is milliseconds. "Complete in 24831 seconds" would be almost 7 hours. Harmless, but sloppy — and it makes practice timing data confusing.
Bug 5 (style): stray trailing commas
A few lines end with a lone comma:
await robot.turn(20),
await larm.run_angle(speed=350, rotation_angle=160, then=Stop.HOLD),
These happen when a line is copy-pasted out of a multitask(...) list, where commas separate the items. Python doesn't crash — it quietly builds a 1-item tuple and throws it away — but the comma is noise and confuses readers. Delete them.
Bug 6 (style): duplicate imports
Run 3 imports from pybricks.tools twice on separate lines. Harmless but messy — merge them.
Bug 7 (waste): the unused voltage
setup.py reads current_voltage = hub.battery.voltage() and never uses it. Low battery = weaker pushes and different stall behavior = inconsistent runs. Print it, and complain loudly when it's low!
10Making It Better — This Year's Upgrades
Here's how we restructure last year's code into this year's cleaner version. Each upgrade is a mini-lesson in a real programming principle.
10.1 DRY: Don't Repeat Yourself — constants at the top
Before (facts scattered and duplicated → Bug 1):
print("***** Starting Run 7 *****")
hub.display.number(8)
After (each fact lives in exactly one place):
RUN_NUMBER = 9
MISSIONS = "M15 (Site Marking - Last Flag)"

async def run():
    print(f"***** Starting Run {RUN_NUMBER}: {MISSIONS} *****")
    hub.display.number(RUN_NUMBER)
ALL-CAPS names are a Python convention meaning "constant — set once, never change." Now the run number literally cannot disagree with itself.
10.2 Named settings profiles instead of magic numbers
You met the profiles in Part 3.5 — PRECISE, NORMAL, FAST, defined once in setup.py. Here's how a run uses them:
from setup import robot, PRECISE, FAST

robot.settings(*PRECISE)   # * unpacks the tuple into the 4 arguments
# ... do the delicate mission work ...
robot.settings(*FAST)
await robot.straight(-720)   # sprint home
Now tuning is centralized: make FAST faster in one place and every run gets faster.
10.3 A finish_run() helper
Every run ends with the same ritual (gyro off, print time). Repeated code → make it a function in setup.py:
# In setup.py
def finish_run(run_number):
    robot.use_gyro(False)
print(f"Run {run_number} complete in {timer.time()/1000:.1f} seconds")(:.1f formats the number to 1 decimal place — "24.8 seconds", always in seconds. Fixes Bug 4 everywhere at once.) Each run file's last line becomes finish_run(RUN_NUMBER).
10.4 The big one: a menu that doesn't quit (and a dictionary!)
Two problems to fix at once: the break bug (Bug 3), and the 60-line wall of elif selected == N: import runN ... repetition.
There's a subtlety: import run1 executes run1.py only the first time. Python caches imported modules, so the old "import inside the loop" style only works once per module anyway. The robust pattern — the one used by experienced Pybricks FLL teams — is: import all runs at the top, store their run functions in a dictionary, loop forever.
# main.py — new and improved
from pybricks.tools import hub_menu, run_task
from pybricks.parameters import Color
from setup import hub, sensor, timer

import run1, run2, run3, run4, run5, run6, run7, run8, run9

# A dictionary: each menu number maps to that run's function.
RUNS = {
    1: run1.run,  2: run2.run,  3: run3.run,
    4: run4.run,  5: run5.run,  6: run6.run,
    7: run7.run,  8: run8.run,  9: run9.run,
}

# Which run each attachment color should put FIRST in the menu
FIRST_RUN_FOR = {
    Color.WHITE: 1, Color.YELLOW: 3, Color.RED: 5,
    Color.GREEN: 6, Color.BLUE: 7,
}

def build_menu():
    """Read the attachment color and reorder the menu to match."""
    color = sensor.color()
    start = FIRST_RUN_FOR.get(color, 1)   # .get() = lookup with a fallback
    print(f"Sensor color: {color} -> starting menu at run {start}")
    # rotate (1..9) so 'start' comes first, e.g. start=5 -> (5,6,7,8,9,1,2,3,4)
    return tuple(((start - 1 + i) % 9) + 1 for i in range(9))

def main():
    while True:                       # after each run, come BACK to the menu
        selected = hub_menu(*build_menu())
        timer.reset()
        run_task(RUNS[selected]())    # look up the run and execute it
        print(f"RUN {selected}: {timer.time()/1000:.1f} s")

main()
What we gained:
- ~90 lines became ~30. Adding run 10 next season = two tiny edits (import + one dictionary line), not a new 7-line elif block.
- The menu returns after every run — swap the attachment, and
build_menu()even re-reads the color each time. No restarting between missions on competition day (those seconds count!). - A dictionary (
{key: value}) is the perfect tool whenever you catch yourself writing a ladder ofelif x == something— you're really just doing a lookup. - One trade-off to know: importing everything up front means a syntax error in any run file stops the whole menu from starting. That's actually a feature — you find out at practice, not mid-match.
(The % 9 in build_menu is the "remainder" operator — it makes the numbers wrap around 9 back to 1. Ask a coach to draw it; it's a fun 5-minute whiteboard moment.)
10.5 Print the battery voltage (Bug 7)
In setup.py:
voltage = hub.battery.voltage()   # millivolts
print(f"Robot initialized. Battery: {voltage} mV")
if voltage < 7600:
    print("*** LOW BATTERY - runs may be inconsistent! Charge or swap. ***")
Consistency is everything in FLL; a fresh battery vs. a tired one measurably changes stall behavior and stopping distances.
10.6 Descriptive names for mission phases
Run 4 already does something great — copy it everywhere:
print("Phase 1: Exiting base")
print("Phase 2: Turn towards gears and Activate gears")
print("Phase 3: Repositioning to pull pan")
When the robot misbehaves at practice, the console tells you exactly which phase it died in. Cheap, priceless debugging.
11Accurate Every Time
Doing all the missions once is great. Doing them every game is how you win. The difference isn't luck — it's hunting down anything that's a little bit random and making it reliable. The team checklist:
Notice the pattern: make every step either self-correcting or re-checked against something real, then measure and fix the shakiest one. Repeat. That's the whole secret to winning consistency.
12Your Turn — The Practice Ladder
Reading about code teaches you about code. Typing code teaches you code. Climb these levels in order at practice — and type everything yourself. No copy-paste. Your fingers learn Python faster than your eyes do.
Level 1 — Paper Python. No robot needed. (a) Make a variable points worth 20, add 15, print the total. (b) With brightness = 55, predict which line this prints: if brightness < 20: print("LINE!") / else: print("mat"). (c) Write countdown() — a function that prints 3, 2, 1, "GO!". (Worked answers in Appendix C.) Done when: your paper answers match Appendix C.
Level 2 — Hello Robot. Make the hub display your favorite number, glow green, and print "TEAM 71494!" to the console. Done when: your message appears on your laptop screen and the number glows on the hub.
Level 3 — Shapes. Drive a 300 mm square: four straights, four turns. Then a triangle. Then rewrite the square using a for loop and count how many lines you saved. Done when: the robot ends up where it started, facing the way it started.
Level 4 — Curves. Replace two sides and one corner of your square with a single robot.arc(...). Time both versions with timer. Which is faster, and by how much? Done when: you have two measured times written down.
Level 5 — Arms. With a test attachment on rarm: use run_until_stalled (low duty_limit!) to find the arm's bottom, reset_angle(0), then run_target it to exactly 90°. Done when: the arm lands at 90° every single time, no matter where it started.
Level 6 — Multitask. Drive straight 400 mm while raising the arm 90°. Then break it on purpose: put two larm commands in one multitask and watch what happens. Safe crash, good learning. Done when: you can explain the one rule of multitask to a teammate.
Level 7 — Bug fixer. Take last year's Run 9 file and apply the 10.1 and 10.3 fixes for real: RUN_NUMBER constant, finish_run() helper. Done when: the printout says Run 9, the display shows 9, and the time is in seconds.
Level 8 — Plan a mission on paper. Pick one BIOGLOW mission. Before any code: write the mission name, the attachment it needs, and a numbered move list (drive / turn / arc / arm, one row per move). Great coders plan first, then type. Done when: a teammate can walk your plan on the mat with a finger.
Level 9 — Your first mission run. Turn the Level 8 plan into run1.py for the new robot using the Part 6 skeleton: settings → multitask launch → mission moves → finish_run(). Get it working standalone, then wire it into the new dictionary menu. Done when: you can launch it from the color menu and it scores.
Boss level — Consistency. Run your mission ten times in a row and count successes. Anything below 8 out of 10 is not competition-ready. Figure out why it fails — battery? starting-position jig? gyro drift? too fast near the model? — and fix the cause, not the symptom. Done when: 8/10 or better, and you can name the failure cause you eliminated.
ACheat Sheet
One page to tape next to the practice table. When you forget a command mid-practice, it's here.
Driving (mm, degrees; + is forward/right, − is backward/left)
await robot.straight(300)
await robot.turn(-90)
await robot.arc(radius=200, distance=300)   # +radius curves right
await robot.arc(radius=-60, angle=-45)      # -radius left; -angle/distance = reverse
robot.settings(speed, accel, turn_rate, turn_accel)
robot.settings(*PRECISE)                    # named profile from setup.py
robot.use_gyro(True_or_False)
robot.stop()
Arm motors
await larm.run_angle(speed=500, rotation_angle=90, then=Stop.HOLD)
await larm.run_target(speed=500, target_angle=90)    # go TO a position
await larm.run_until_stalled(speed=500, duty_limit=20, then=Stop.COAST)
larm.reset_angle(0)
larm.control.limits(speed=1000, acceleration=4000, torque=1000)
Multitasking
async def run(): ...
await multitask(task_a(), task_b())    # different devices only!
run_task(run())
await wait(500)          # pause 500 ms (async-friendly)
Hub & tools
hub.display.number(3)          # fits -99 to 99 only
hub.display.icon(Icon.HAPPY)
hub.light.on(Color.GREEN)
hub.speaker.beep()
hub.battery.voltage()          # millivolts
timer.reset(); timer.time()    # milliseconds!
selected = hub_menu(1, 2, 3)
sensor.color()
Python quickies
name = value                   # variable
if a == b: ...                 # elif ...: ... else: ...
for i in range(3): ...
while True: ...   # break exits
def my_function(argument): ...
RUNS = {1: run1.run}           # dictionary: RUNS[1]
print(f"time: {timer.time()/1000:.1f} s")BGlossary & Documentation Links
The words that make you sound like you've been doing this for years.
- argument — a value you pass into a function's parentheses
- boolean — a True/False value; the answer to a yes/no question
- constant — an ALL_CAPS variable that is set once and never changed
- coroutine — an
async deffunction that can pause (await) so other tasks can run - dictionary — a
{key: value}lookup table - f-string —
f"text {variable}"— text with live values embedded - function — a named, reusable block of instructions, made with
def - import — pull in code from another file or library
- indentation — leading spaces that define what's "inside" what — in Python, this is grammar
- stall — when a motor pushes but can't move; used deliberately to find an arm's physical limits
- string — text in quotes
- tuple — an ordered, unchangeable bundle of values:
(1, 2, 3)
Documentation links
- Pybricks API reference (the truth): docs.pybricks.com - DriveBase — straight / turn / arc / settings / use_gyro: robotics page - Motors — run_angle, run_target, run_until_stalled, control.limits: pupdevices → Motor page - multitask / run_task / hub_menu / StopWatch / wait: tools page
- Pybricks guided lessons (great homework): pybricks.com/learn
- Pybricks code editor: code.pybricks.com
CAnswer Key (No Peeking Until You Tried!)
Level 1a
points = 20
points = points + 15   # take what's in the box, add 15, put it back
print(points)          # shows: 35
Level 1b
brightness = 55

if brightness < 20:
    print("LINE!")
else:
    print("mat")
It prints mat — 55 is not under 20, so Python takes the else road.
Level 1c
def countdown():
    for n in range(3, 0, -1):   # counts 3, 2, 1
        print(n)
    print("GO!")

countdown()
Level 3 (the loop version of the square)
from setup import robot

for side in range(4):
    robot.straight(300)     # no await — this is a top-level test, not a run file
    robot.turn(90)
Bonus thought: after those four turns the robot should face exactly the way it started. If it doesn't, your axle_track needs tuning — see Part 3.4.
Level 5
from pybricks.parameters import Stop
from setup import rarm

rarm.run_until_stalled(-200, then=Stop.HOLD, duty_limit=20)
rarm.reset_angle(0)
rarm.run_target(speed=500, target_angle=90)DThe Video Lab
The boss level said it: anything below 8 out of 10 isn't competition-ready. But how do you find out why a run fails 3 times out of 10? You measure. This appendix turns the family phones into measuring instruments, using a free tool called ffmpeg. If building robots isn't your favorite job on the team, this chapter might be — every team needs a data engineer.
Two rules make practice video worth analyzing, and they're both free:
- The camera never moves. Build a LEGO phone clamp for the table edge, aimed at the mission model. Same spot, same angle, every practice. Comparing videos only works when the only thing that changed is the robot.
- Every run announces its own start. One beep from the hub right before launch gives every recording a sharp audio spike to line up on. In the new menu from Part 10.4, add one line before the launch:
hub.speaker.beep(880, 200)     # one short beep = "run starts NOW"
run_task(RUNS[selected]())
Now the robot, the video, and the timer printouts all share the same starting gun. Congratulations — you've built a telemetry sync system. (That's what grown-up engineers call it. You can call it the beep.)
D.1 Getting ffmpeg
ffmpeg is a free command-line video tool — no windows, no buttons, just commands you type. Ask a parent to install it (on Windows: winget install ffmpeg; on Mac: brew install ffmpeg), copy the run videos from the phone into a folder, and open a terminal there. Each recipe below is one command. You don't need to understand every symbol — you need to know what each recipe is for, the same way you use print() without reading how it works inside.
D.2 Recipe 1: Burn a stopwatch into the video
ffmpeg -i run.mp4 -vf "drawtext=text='%{pts\:hms}':fontsize=48:fontcolor=yellow:x=20:y=20" timed.mp4This stamps a running clock onto every frame. Scrub to "arm touches the model" and read the exact time — then compare it with the phase printouts from Part 10.6. If the console says Phase 2 ended at 8.1 seconds but the video shows the arm arriving at 9.0, that missing 0.9 seconds is real information: the wheels slipped, or the robot hesitated, somewhere in Phase 2.
D.3 Recipe 2: A pass and a fail, side by side
Trim both clips so they start at the beep, then glue them into one split-screen video:
ffmpeg -i pass.mp4 -i fail.mp4 -filter_complex hstack sxs.mp4Here's the secret this recipe reveals: the failure almost never happens where it appears to happen. The missed mission model at 18 seconds usually traces back to a heading error two degrees wide at 6 seconds. Play the pass and the fail in lockstep and find the first frame where they differ — that's where the real bug lives. Fix where the runs diverge, not where the run dies.
D.4 Recipe 3: The ghost overlay
Blend two synced runs into one see-through video:
ffmpeg -i run1.mp4 -i run2.mp4 -filter_complex "blend=all_mode=average" ghost.mp4If the robot is perfectly consistent, the two ghosts sit exactly on top of each other and you see one robot. If it isn't, you see a blurry double robot — and the moment the ghosts split apart is the moment inconsistency entered the run. Nine times out of ten it's the launch position or the first turn. This is the Part 12 boss level, drawn as a picture.
D.5 Recipe 4: The spread montage
Pull a photo from the same moment of every run — say, 5 seconds after the beep:
ffmpeg -ss 5.0 -i run3.mp4 -frames:v 1 t5_run3.pngRepeat for all ten runs (change the file names), line the photos up, and because the camera never moved, you can count mat squares to measure the spread: "at 5 seconds we're anywhere in a 40 mm window." Now run the real experiment — change exactly one thing (the starting jig, a slower settings() profile, a fresh battery) — take ten more runs, and re-measure. Did the window shrink? You just did science to your robot.
D.6 Recipe 5: Slow-motion the contact moment
ffmpeg -i run.mp4 -vf "setpts=4*PTS" -an slow4x.mp4Four-times slow motion of the attachment meeting the model shows what full speed hides: the arm flexing before it lifts, the claw bouncing once before it grips, the model getting nudged out of reach by the approach itself. When a mission "randomly" fails, it's rarely random — it's just fast.
D.7 The Video Lab workflow
- At practice: clamp the phones, hit record once, leave them running. Every run beeps its own start mark.
- That evening: the data engineer trims the clips at the beeps and makes two things — a ghost overlay and a spread montage.
- Next practice opens with two pictures and one question: what single thing do we change this week?
- Save the best before/after clips. Robot Design judges love documented iteration — "here's the failure, here's our diagnosis, here's the fix working" is exactly the story they're hoping to hear.

Built for Habitat Hackers #71494 from the 2025–26 season binder. Now go make BIOGLOW glow. 🤖